

Fire Craft
How to Build a Campfire Step by Step: The Elevator Fire Lay™ Method
Most campfires fail before they start — not because of bad wood, but because of skipped fundamentals. Here's the step-by-step method that fixes that.
By Joshua Enyart · Founder & Head Instructor, Gray Bearded Green Beret
Former Army Ranger, Green Beret, and full-time survival instructor · three decades of professional instructor experience
Most campfires fail before they start. People pile wood on a match, the flame dies, and they blame the wood — but the wood isn't the problem. Skipped fundamentals are. The fire triangle gets ignored, the fuel isn't prepped in the right sequence, and air gets cut off the moment fuel is stacked too tight.
Special Forces veteran and survival instructor Joshua Enyart developed the Elevator Fire Lay™ specifically to solve the number-one campfire killer: not enough air. This guide walks you through how to build a campfire step by step — the science behind why fires work, how to select and prepare your fuel, how to construct the Elevator Fire Lay™, and how to light it reliably every time.
The Science Behind Every Campfire
Before you touch a single piece of wood, you need to understand what you're actually doing. The Fire Triangle is the foundational model of combustion: heat, fuel, and air. All three must be present in the correct ratio for combustion to occur and continue. Remove or restrict any one side and you get smoke with no fire — or no reaction at all. Everything you do when building a campfire is a direct manipulation of the Fire Triangle.
Just as important is understanding what instructors sometimes call the Fire Train. Think of a locomotive starting from a dead stop and gradually building speed. There is no shortcut to getting that train up to full momentum — and there is no shortcut to a sustainable campfire. Your ignition source transfers heat to the finest, most combustible material available. That material burns long enough to transfer heat to fuel that's slightly larger. That transfer continues through fuel that gradually increases in size, until the fire is self-sustaining.
"Doing it right from the start will be much quicker than doing it again because it didn't work the first time."
— Joshua Enyart
Skipping steps on the Fire Train is the fastest path to failure. The Elevator Fire Lay™ builds these principles directly into its structure — giving you a framework that sets the correct fuel sequence and keeps air available on demand.
Step 1 — Gather the Right Fuel
Every campfire requires three categories of fuel: tinder, kindling, and sustaining fuel. Gather all three before you light anything — there's no going back to collect more once the fire is underway.
Tinder
Tinder is where heat meets fuel. It needs to be dry, finely processed, and — to use the right word — fluffy. It's meant to readily accept heat from your ignition source and burn long enough to transfer that heat to kindling. For a tinder ball (the simplest and most effective bundle for campfire use), think coarse, medium, and fine material all in one package. In fair weather, aim for a ball roughly the size of a softball. In cold or wet conditions, double it. Having too small a tinder ball is one of the most common reasons a campfire fails to establish.
Kindling
Kindling is the next stage. When you think of kindling, think of three sizes: matchsticks, pencils, and markers. Gather all three — not just one — because you need that gradual size progression for heat to transfer reliably through the Fire Train. Softer woods and resinous species like pine catch quickly and work well. The kindling doesn't need to burn for an extended period; it just needs to stay lit long enough to hand the fire off to sustaining fuel.
Sustaining Fuel
Sustaining fuel is what keeps your campfire going once it's established. Start thumb-size to wrist-size before going larger. Hardwoods — hickory, oak, maple, ash — burn slower and longer once lit, building the lasting coal bed you need for a good campfire. On quantity, experience has a consistent lesson:
"When you think you have enough, you need five times more than that."
— Joshua Enyart
Gather more than you think you need before you light anything.
A Note on Fatwood
Fatwood — also called lighter knot or fat lighter in some regions — is resin-soaked pine found in stumps and branch junctions after a tree dies. The resin preserves the wood long after the surrounding sapwood has decomposed, and it lights reliably in wet conditions where other tinder won't. In the Southeast, it's abundant. Look for wood that's deep orange in color, smells like a pine-based cleaner, and feels waxy to the touch. It burns well with both open flame and a spark from a ferrocerium rod. Keep processed fatwood shavings in your fire kit as a wet-weather insurance policy.
Step 2 — Prepare Your Tinder Bundle
Prep your tinder bundle before you start building the fire lay. For the Elevator Fire Lay™, a tinder ball works best — a softball-sized bundle of coarse-to-medium material with a golf-ball-sized core of fatwood shavings nested in the center.
To process fatwood, choose a small stick with plenty of surface area. Use the 90-degree spine of your knife — not the cutting edge — to shave the wood. The spine removes material without dulling the blade. Use the leverage point near the handle for consistent strokes, and work toward the end of the stick. Collect shavings on a green leaf placed on the ground to keep them together. Once you have a golf-ball-sized pile, create a small pocket in the center of your tinder ball and nestle the shavings inside.

If conditions are dry and your natural tinder is well processed, you may not need fatwood at all. A tinder ball of finely broken-down inner bark, dry grass, or dead wildflower tops will light just as readily in fair weather.
Step 3 — Build the Elevator Fire Lay™
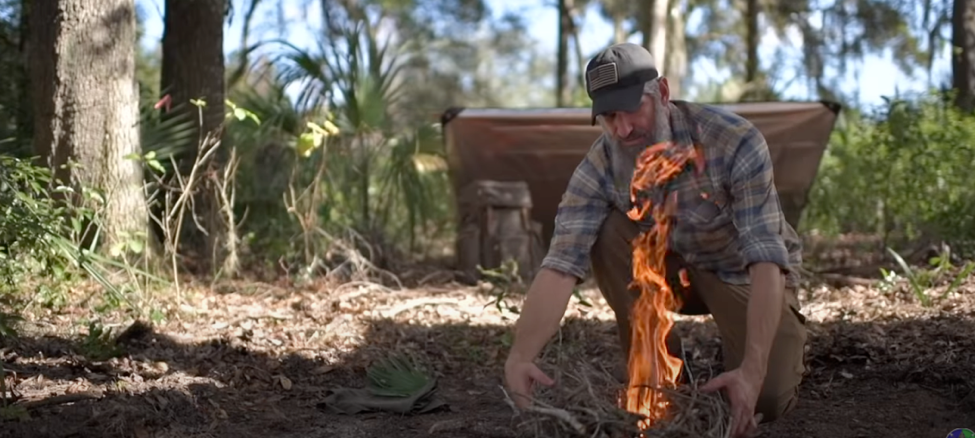
The Elevator Fire Lay™ is Joshua Enyart's preferred campfire structure — and the one he calls a "beard saver," because you don't have to get your face close to the flames to coax a struggling fire back to life. The key feature is a triangular framework of fuel that can be physically lifted to introduce air at the base of the fire, without blowing on it.
Here's how to build it:
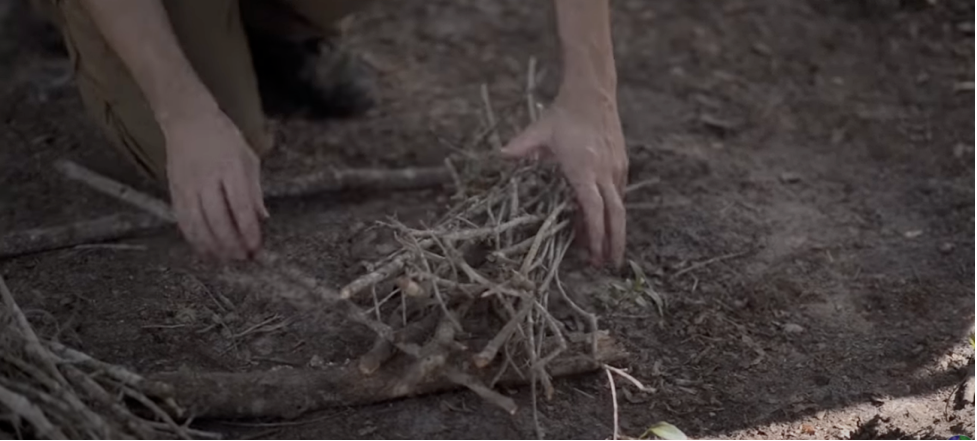
- Place a large piece of sustaining fuel toward the back of the fire lay to act as a fulcrum.
- Form a triangle with long pieces of thumb-sized sustaining fuel, using that fulcrum as the anchor at the rear.
- Place a bundle of kindling on each side of the triangle and a third bundle at the apex.
- Leave the center open — that space is reserved for your tinder bundle.
Before you light anything, check that you can grip the corner of the triangle at the lift stick and raise it easily. That lifting motion is the entire point of the design. Keep additional kindling staged to the sides — once the fire catches, you'll pull from those reserves and add them on top so heat can climb through them.
Step 4 — Light the Fire
With the Elevator Fire Lay™ built and your tinder bundle ready, work through this sequence:
- Light your tinder bundle and place it in the center of the fire lay.
- Pull the top bundle of kindling down over the burning tinder. Heat transfers from the tinder to the kindling — allow time for that transfer to happen.
- If you see heavy smoke (a sign of incomplete combustion), don't blow on it. Grip the corner of the triangle at the lift stick and raise the entire lay. Air floods the base, combustion improves, and smoke clears.
- Once combustion is good, lower the triangle. Begin pulling kindling from the sides and placing it on top, feeding the Fire Train upward.
- Add progressively larger sustaining fuel as the fire gains momentum. Once flames are climbing above the level of the fuel, it's safe to add more without smothering it.
Lighting With a Ferro Rod
If you're using a ferrocerium rod, use the Pin and Pull technique. Kneel and place your non-dominant foot next to the tinder bundle. Pin the striker — the 90-degree spine of your knife works well — to the top of your foot, oriented so sparks scatter forward and down onto the bundle. Hold the striker stationary and pull the rod in a firm scraping motion away from the tinder. Sparks originate from the edge of the striker, so angle it correctly before you pull.
Use a large rod — approximately ½ inch thick and 5–6 inches long — for more material per stroke and easier handling when your hands are cold. Any more than three strikes and something is wrong: either your technique or your tinder. Stop, reassess, and address the problem before continuing.
A Word on Fire Safety
Before lighting any campfire, clear the area. Duff — the layer of leaf litter, dry sticks, and debris surrounding the fire site — should be cleared at a minimum three-foot radius from the fire's center, down to bare dirt if possible. Check overhead for low-hanging branches with dry leaves. On windy days or in particularly dry conditions, clear a larger area.
A ring of rocks around the fire keeps your coal bed contained and prevents fuel from rolling out of the lay. Choose your rocks carefully — avoid anything pulled from a stream bed, which is likely to hold trapped moisture. Rocks with moisture can crack or fragment explosively when heated. Granite and similarly non-porous rocks are reliable choices.
Burns in the field are more serious than they seem. They get infected easily, they affect your ability to thermoregulate, and in a remote environment, medical care is not available. Treat fire with the same respect you'd give any tool capable of serious injury — and never leave a fire unattended until it's fully extinguished.
Recommended Fire Kit
The Elevator Fire Lay™ works with what you have in the field. But a well-built fire kit eliminates the variables — here's what belongs in one:
The Fire Kit
Fire Craft
More fire and kit content from Gray Bearded Green Beret
Free PDF
Wilderness Survival Gear Guide — Free PDF
Get the Wilderness Survival Gear Guide free — gear selection, kit building, and the foundational principles behind every survival priority.
No spam. Unsubscribe anytime.

Learn to Survive
Gray Bearded Green Beret's Guide to Surviving the Wild
Hardcover · Full Color · 430 Pages · by Joshua Enyart
The Elevator Fire Lay™ is covered in Joshua's book alongside every other foundational survival skill — fire, shelter, water, navigation, first aid, and more. The most complete single resource for learning wilderness survival.
Into the Woods™ — GB2 Network™
See How to Build It on the GB2 Network™
Watch the Elevator Fire Lay™ built in the field as part of Into the Woods™ — the wilderness survival field series showing the GB2 System of Training™ applied across different regions, conditions, and seasons.
Watch the Episode →Train With Us in Person
The Wilderness Survival Course is a 3-day foundation training covering fire, shelter, water, navigation, first aid, signaling, and tools — taught in the field by Joshua Enyart. Regional events across the U.S. fill early.
See Upcoming Dates →Joshua Enyart
Founder & Head Instructor · Gray Bearded Green Beret
Former Army Ranger and Green Beret with three decades of professional instructor experience. Joshua trains civilians and military alike through regional live training events across the Northeast, Southeast, Northwest, and Southwest United States in wilderness survival, bushcraft, navigation, preparedness, and wilderness medicine. Hope to see you in the woods.